AGD 2018 Tutorial Chapter 01 - The Beginning ⚫①
EXPERIMENTAL CONTENT
AGD: Chapter One
Hello everyone! We’re starting a tutorial here.
This has been long-awaited by part of the Spanish-speaking scene, specifically a Spanish version of Paul Jenkinson’s well-known videos 🌐🟡③ about this fantastic game maker.
Beyond the language issue, there’s also the matter of the version. Those tutorials date back to 2012 and refer to AGD 3.0.
As I write these lines, I’m using version 4.7, so I’ve deemed it worthwhile to take up the mantle and begin this updated translation of those tutorials.
However, not everything will be identical. I’ll follow the wisely laid-out order of the original videos, but there will be changes.
With the help of Sergio 'thEpOpE' and other colleagues, I’ll aim to expand and complement this course with additional articles and various tips.
But let’s take it step by step—first, this phase :)
Why a Text-Based AGD Tutorial Instead of Video? (At Least for Now)

Without a doubt, the ultimate goal is to have both versions.
However, any truly accessible video must include transcription and/or subtitles for people with hearing disabilities.
Given the universal aim of this tutorial, I’ve chosen to create it in text first.
Later, I plan to use this as the transcribed version for the video.
Once both are done, the work will be complete.
(Note 2025: Creating the video version could be an interesting exercise for practicing AI applied to retro gaming.)
Besides accessibility, there’s the matter of the script. I don’t want to improvise more than necessary to teach how it’s done, so this first version will also serve as the script for the videos.
With that said, let’s get to it!
What Is AGD?

If you’ve made it this far, you likely know what it is, but I’ll explain anyway: AGD (short for Arcade Game Designer) is software created by Jonathan Cauldwell 🌐🟡③ for creating arcade games. It includes various tools, runs on the machine we’re developing for, and even features a sort of BASIC that lets us define and control the logic of our little creation.
There are different versions, but this tutorial focuses on version 4.7 for ZX Spectrum, the latest available at the time of writing. On the AGD forum (in English) - ttp://arcadegamedesigner.proboards.com/ - you (Note 2025: "could," as it’s no longer available today) keep up with everything related to this tool.
Let’s Get Started: How Do I Use AGD?
Nothing simpler. After downloading our Starter Kit 🟡③ and unzipping it, you’ll notice AGD comes in .tap format, so you just need to load it in your usual emulator or machine.
The only thing to keep in mind is that AGD was originally designed for ZX Spectrum 128k, so it’s recommended to load it in that mode. That said, I often use it via Retro Virtual Machine with a +2 Grey machine and haven’t had issues, except for some memory corruptions when using the code and text editors. I can’t confirm this is due to the model change, but it doesn’t hurt to stick to this requirement to stay on the safe side.
Still, it can’t be definitively stated that using another model causes specific problems, so it’s up to each user whether to follow this recommendation.
While you’re loading from tape, let me mention an important point: AGD is not backward compatible. What’s created with AGD 4.6 cannot be edited with AGD 4.7, so:
- Keep copies of every AGD version you use.
- Choose your version carefully for a game, as once you start, you can’t switch without rewriting everything.
Okay, Now What? The Initial Load
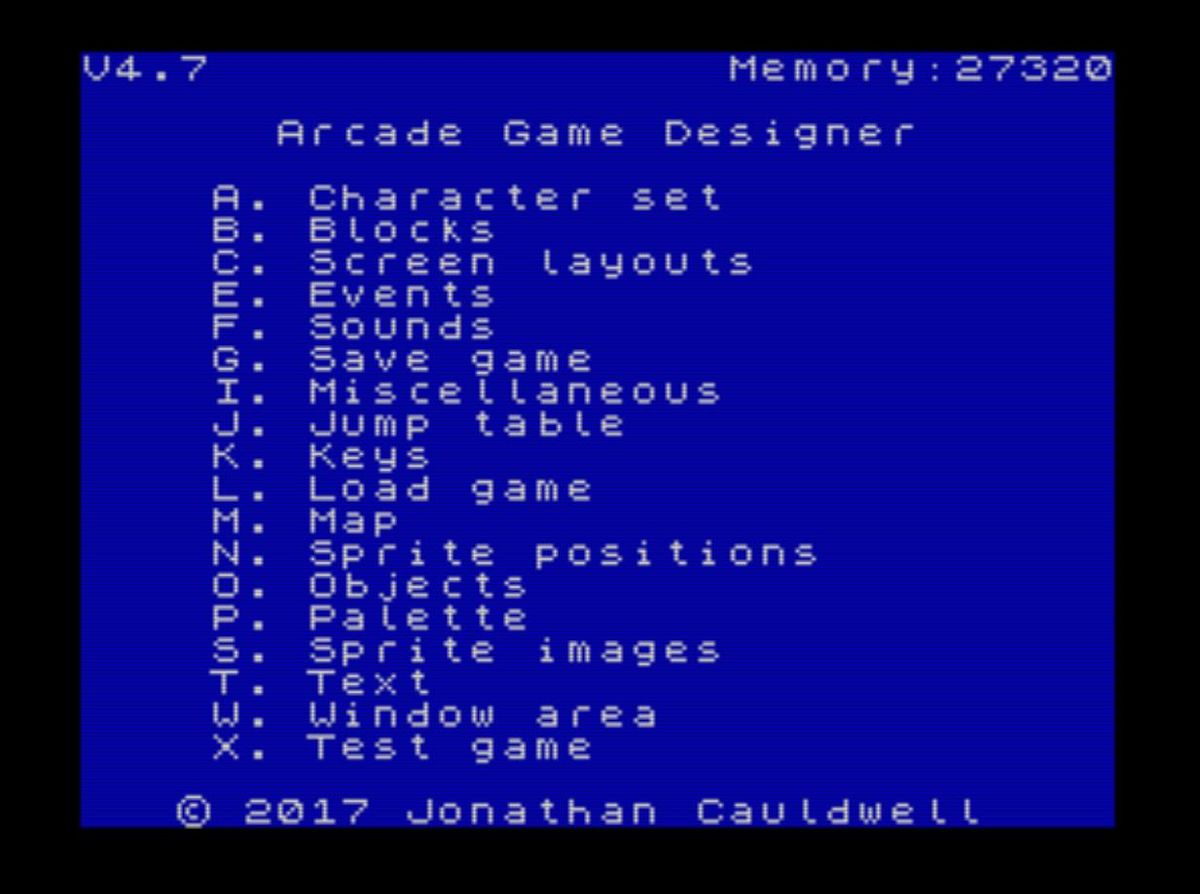
After loading, the main menu screen shown at the start of this chapter will appear. It provides keyboard shortcuts to access all the tool’s options.
In addition to the list of options, the menu screen displays:
- The current AGD version in the top-left corner.
- The remaining free memory in the top-right corner. It’s crucial to check this regularly to ensure balanced memory usage for your game’s elements. If you don’t monitor it, you might run out of memory mid-development.
While we’ll eventually cover all options, to keep the learning curve as smooth as possible, we’ll follow the “logical” order established by the author of the English videos, which I find spot-on. First, we’ll focus on:
- A - Character Editor
- W - Window Area
- K - Keys
A - Character Editor
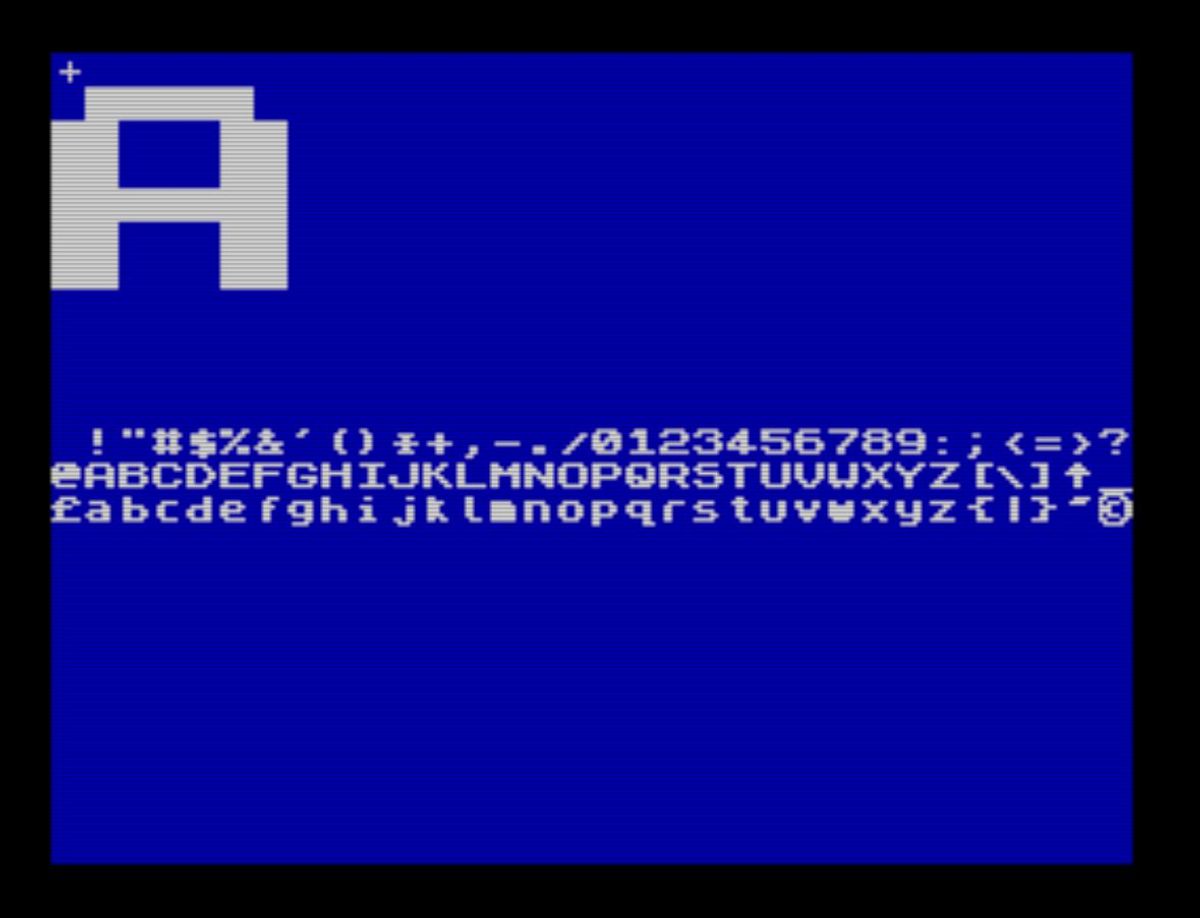
While we won’t dwell too much on this feature, as it’s fairly self-explanatory, for the sake of completeness in this AGD tutorial, it’s worth noting that this screen lets you redefine the Spectrum’s default font to create custom letters, numbers, and symbols.
To access it, press A from the main menu. You’ll see the grid of available game characters and the area where you’ll edit the selected character.
Use N (Next) and P (Previous) to navigate. Once you’ve selected the character to edit, use the cursor keys to move around the character and the Space key to add or remove pixels.
When satisfied, press Enter to return to the main menu—simple as that.
The editor includes options to load and save fonts from tape, but we won’t cover those here, as they’re beyond the scope of this introductory tutorial.
W - Window Area
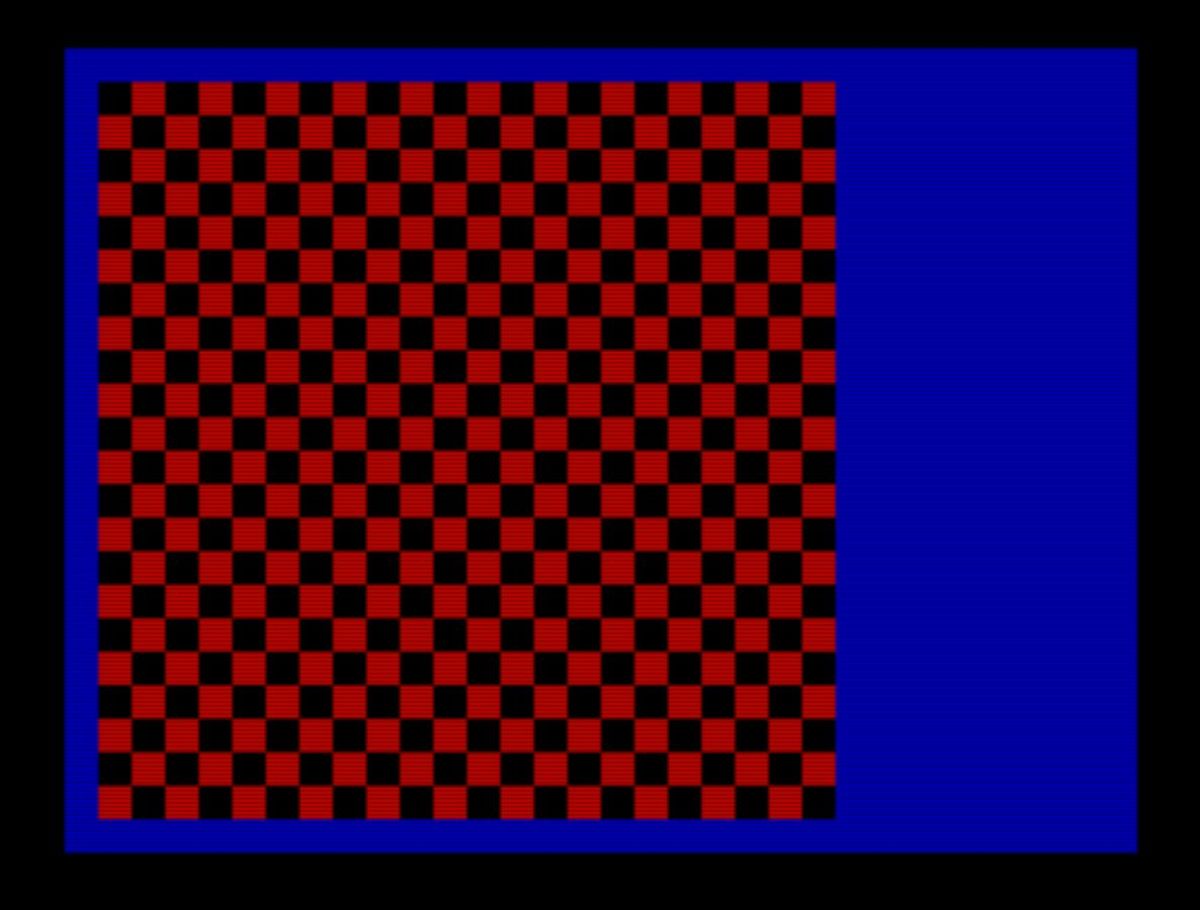
The first thing to define in your AGD game is the screen area. This shouldn’t be chosen lightly, as changing it later will cause AGD to erase much of the work done so far.
Take your time to decide if you want a horizontal game or any other possible configuration.
AGD makes defining it easy with these keys:
KEYS
======= -------------------------------------
- 1/2 to increase or decrease the horizontal size.
- Q/A to adjust the vertical size.
- 5/6/7/8 to move the block (formed by red and black squares) across the screen.
This colored grid is where your game will come to life. Once defined, simply press Enter to return to the main menu.
Remember: If you change it, AGD will erase all created screens and sprite positions (thanks, Sergio), so decide your game area carefully before diving into further development!
K - Keys
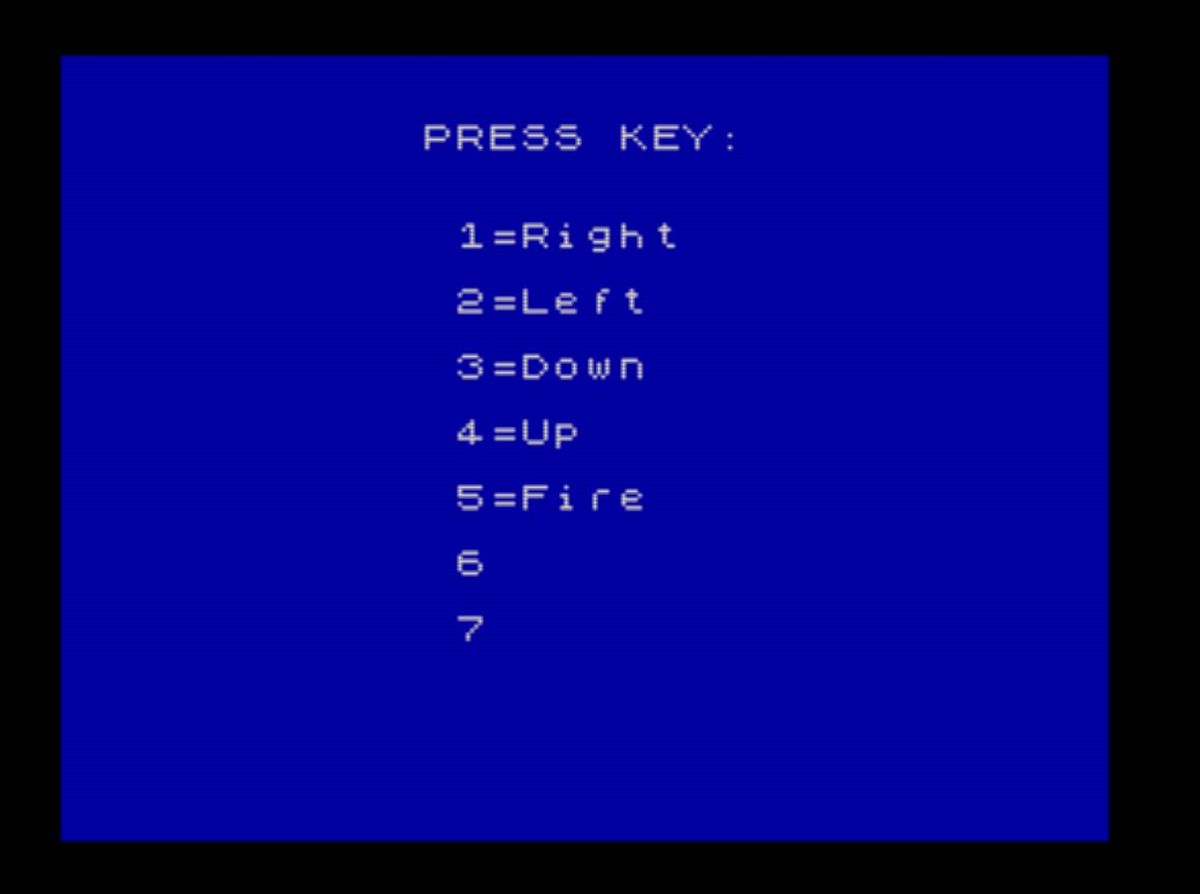
To wrap up this first part of our AGD tutorial, we’ll tell the environment which keys will control our game.
Press K, and the system will prompt you (note that it asks for keys in a somewhat unusual order):
- Right
- Left
- Down
- Up
- Fire
- Two additional keys (6 and 7) that can serve any purpose you want.
Once selected, the editor automatically returns to the main menu.
Keep in mind these are the keys AGD will detect when we write the code controlling our protagonist. So, be careful when defining them and, most importantly, write them down somewhere for reference, as AGD doesn’t provide a way to “view” the currently defined keys.
This will be especially important when we start using keys for actions that weren’t their original intended purpose.
Recap
In this first approach, we’ve learned the basic handling of the editor and defined characters, the game area, and keys.
In the second part, we’ll continue our journey to create our first AGD game.
One final note: I strongly urge you not to just follow this tutorial’s steps mechanically. Experiment, try things, lose the fear of breaking stuff—it’s the only way to learn: sail beyond the horizon and, if needed, swim back.
What’s Next?
- If you’re not into tiles, stay on page 1
- If all your fleas and critters are champs in Bugaboo style, hop to page 2!
References
Lang
- Información IA: Generado asistido por IA (Grok-3, Raúl Carrillo aka Metsuke). Supervisado por Humano.
- Ultima Modificación: 2025-06-10 04:50:05.679000+00:00
- Versión Documento: 0.2.13